10 simple no cost tips and tricks to improve your photography
Recently a friend that is relatively new to photography asked me what they could do to create better photographs. So often when talking about improving ones photography, the conversation moves to getting “better” gear. Don’t get me wrong, I love gear and gadgets but photography really is not about the gear. It is about the photographer’s vision, and the ability to capture a moment in time that tells a story. A story that conveys an emotional response of some kind with the audience.
I sat down and came up with a few suggestions on how they might be able to improve their photography, without spending any money. These are simple tips and tricks that anyone can use, and that will make a world of difference in ones photography.
Tip # 1 – Get Closer
My number one tip is to get closer to your subject!
- A photograph is a story of a subject, make it clear what that subject is
- Don’t be afraid to fill the frame with your subject
- Your feet are the BEST zoom that you will ever own
- Eliminate any distractions to your subject by NOT including them in the frame
- In the following photograph it is very clear that the apple is the subject, and I got in really close to fill the frame with it
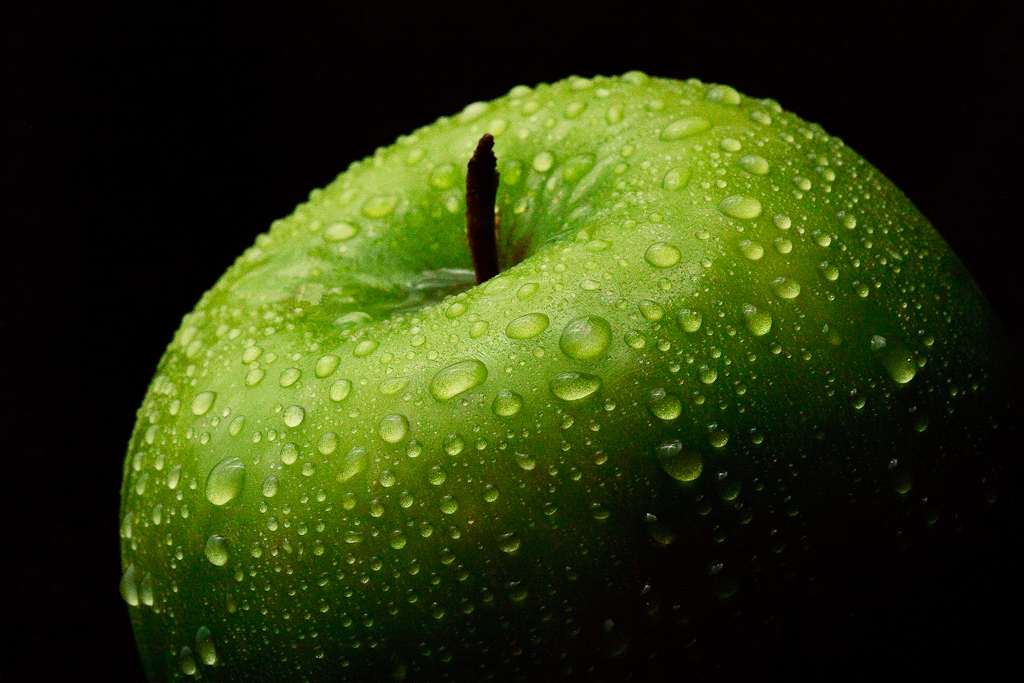
An Apple a Day
Tip # 2 – Previsualize
Take a moment to stop and think before you click the shutter
- What is it that caught my eye, that caused me to want to make a photograph of this scene?
- Is what I see through my viewfinder what caught my eye?
- What is the camera going to do that I DON’T like, and how can I compensate for that?
Tip # 3 – Ask “What If?”
So often my favorite photograph is not the first shot I took, but rather the 10th, 15th, or even the 20th! Experiment and try different things!
- What If I took a step to the right? What if I stood up here on this rock? What if I got down and laid flat on the ground?
- What if I left the shutter open for a really long time and things were intentionally blurry?
- Playing this simple little game gets you to see your subject in a different light (pun FULLY intended, sorry!)
Tip # 4 – Get Low
Get down on the ground and show us what you see from a different angle
- If you stand up and hold the camera to your eye, you will record the same photo as many others before you!
- Show us something different!
- Get down on your knees, or better yet lie down on your belly!!!!
- I keep a pair of roller hockey knee pads with my camera for this very reason
- In order to make the sea shell a significant part of this photograph I was flat on my belly using a bean bag to support the camera
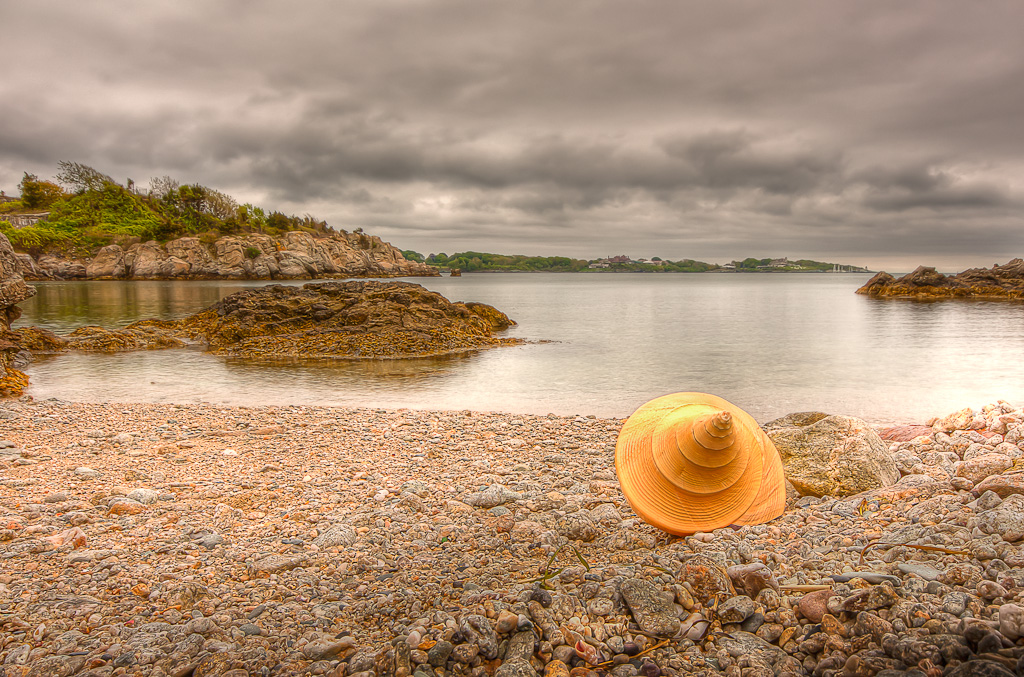
Sea Shell by the Sea Shore – Fort Wetherill, Rhode Island
Tip # 5 – Get Stable
¼ of a second seems pretty quick to you and me , but to a camera it is a long time.
- If your camera moves even the tiniest bit during this time, your image will come out blurry!
- A tripod is your single, best friend
- A small beanbag can be a miracle worker (I keep one of these with my camera all the time too!)
- Simply leaning against a fence, a pole, a rock or any other solid object that helps keep your body still will help!
Tip # 6 – Look for the Light
Take a moment to look at where the light is coming from and ask if changing the direction of light on the subject is desirable, or even possible
- Can you move your subject to where the light is more flattering?
- Can you move yourself so that the light is more flattering?
- Would side lighting be better?
- Is there an area of shade that does not have direct sunlight that I can use?
Tip # 7 – Spin the Camera!
Very often a subject is going to fit in the frame much better in portrait orientation then it does in landscape orientation, yet we very rarely use it.
- Take some time to get comfortable shooting in portrait orientation and see a whole new world of possibilities!
- Not every photo must be taken in landscape mode!
- Simply spin the camera in your hands 90 degrees and try portrait orientation
- Many subjects will actually look much better in portrait orientation
Tip # 8 – Watch Your Background
Nothing will make or break a photograph more then the background, and it is often the easiest thing to address
- Ask if the background is important to the story? In a landscape this would be yes, in a portrait this will probably be no.
- Use you Depth of Field to make the background tack sharp (i.e landscapes) , or soft and blurry (i.e portraits)
- Try to keep your background as simple & plain as you can
- You do not want the background to distract from your subject
- A photo of mom with what appears to be a telephone pole growing out of her head is NOT flattering
- A few simple steps to the left/right can often solve this problem
Tip # 9 – Look in the Viewfinder
Honest – take a couple of seconds to scan everything that you see in the viewfinder, especially along the edges of the frame and ask:
- Is what I see something that I want in my photo? Does it add to the story I am trying to tell?
- If it is, is it where/how I want it?
- If it is not, how can I get rid of it or hide it?
- You should be the one that decides on everything that is in your picture!
Tip # 10 – Move away from the middle
- Try to get your subject out of the dead center of your image.
- Try moving the main subject around in the viewfinder
- Do not put the horizon smack dab through the middle of the scene
- Choose what you want to emphasize and make that take up the larger percentage of the image
- Learn the Rule of Thirds and apply it to your compositions
- In the following photo I moved the chair to spot in the frame where the Rule of Thirds lines intersected and then waited for the sailboat to move into a spot where the other Rule of Thirds lines intersected

Wish You Were Here
Tip #11 – Look at photos
11? I thought this was 10 Tips to Improve Your Photography? It was, but I thought of another one, so lets just call this a bonus tip!
- Join a photo sharing service like Flickr (it is free for a basic account)
- Take 5 minutes a day and look at 5 photos that you like
- Ask why you like them
- Study what they did
- Try to say what you could do to get a picture like that
I hope that these tips help you to improve your photography. Take one at a time and work on incorporating them into your photography. You don’t have to wait till the next time you are out in the field, just go grab your camera and start playing. With the LCD on the back of your camera, you have a wonderful tool to simply play and experiment. Play the “What If” game right in your living room, I bet you will be amazed at what you learn and by what you create!
If you have any tips or tricks of your own that you would like to share, add them here in the comments!
9 Comments
Those are great tips. Some I’d heard before but it never hurts to be reminded. Thanks!
Grazie, vostri consigli sono da provare !
Tou sono i benvenuti, fammi sapere come si fanno fuori!
Thank you so much! You reinforced my feeling that I’m getting better. Everything you outlined are things I think of with every click. Especially taking photos from several different angles. A few weeks ago I took 27 frames of a sunset! One frame every 45 seconds to a minute. Out of those I got 3 exceptional ones and 2 good ones. I am so glad someone sent me the link to your page. I’ve saved it and will look for your other pages.
BTW I have a page on 500px.com. ‘Donna Read’ if you have a minute to peek at my work. Don’t worry, I’m not expecting a critique or advice, just sayin’ 😀
I will defiantly check it out!
Glad that you liked it Donna!
Remember the post-processing! You do your best to get it right in the camera but it is a rare picture that cannot be improved in the “digital darkroom”!
Absolutely Mike! Post processing is critical to every image, and I think that knowing how you are planning on processing the image can actually going to shoot the scene.