Creating the Proper Brackets for HDR Photography
Shooting. It all starts out in the field, when I decide that the landscape in front of me might be a good candidate for HDR photography. Once I have made this decision, I start getting setup for the shot. This comes down to 3 things – establishing a stable shooting platform, focusing, and creating a series of photographs at multiple different exposure settings to record the entire tonal range of the landscape in front of me.
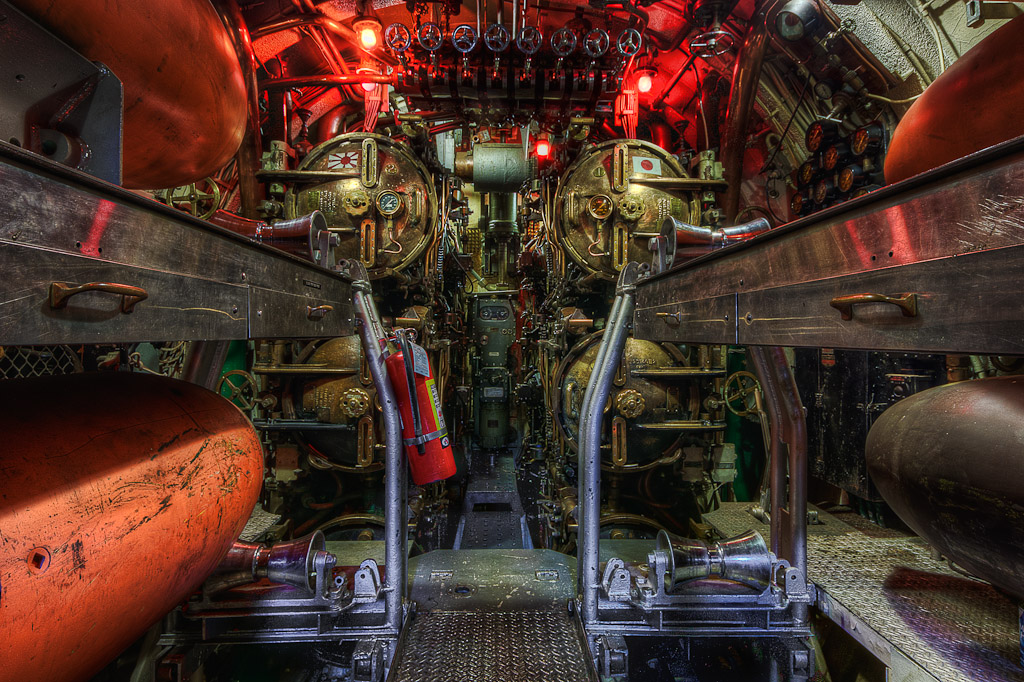
USS Lionfish Torpedo Room
Establishing a stable shooting platform means taking out my tripod and connecting my camera release cable. These 2 things are crucial for getting multiple sharp photographs that can later be turned into one HDR photograph. In some instances, instead of using a tripod i use a small bean bag. This allows me to get my camera extremely low to the ground while maintaining a stable platform. Once i have established a secure and stable shooting platform it is time to begin making photographs. I set my camera to manual focus and use the Live View capability. I zoom in to 5x and 10x magnification and scroll through the photograph on my LCD to check key components of the landscape to make sure that they are in focus.
There are 2 other things that I would like to point out. The first is White Balance, and the second is the importance of shooting RAW. When creating HDR photos, color plays an important part of the equation, and I like to ensure that my colors, at least to start, are accurate. I add saturation and vibrance, and even change colors in my processing, but I want to start with accurate colors. I use a Photovision 14″ Pocket One Shot Digital target. This is a simple little tool that I carry in my bag – I take a photo of if in the lighting conditions that I am photographing in and then use it later on in post to set my White Balance during post processing. As a bonus, it is a nice little tool to help dial the exposure in. Just remember to remove it from the scene BEFORE you create your brackets!
Shooting Raw allows you to retain as much data as possible for later use when post processing your photographs. When your camera is creating JPG photographs for you, the camera takes the RAW data off the sensor and actually develop the photograph for you. The camera will make decisions about what the White Balance should be, how much Saturation and Sharpening to apply, as well as a number of other decisions. It creates the JPG file for you and throws away the data that it does not use. This data that throws away can be a lot – on my camera a RAW file can be 25-28 M, while the high quality JPG file that the camera puts out is about 8 M. That is a LOT of extra data. By shooting in RAW you are gaining two advantages – YOU are getting to make the decisions about how the photograph is developed, and you have a lot more data available for you to develop. Learning to shoot and develop from RAW will be one of the best things that you can do to improve your photography.
With my camera set to Manual Mode I establish my base exposure. I set my ISO to 100, which is the lowest setting my camera allows, to minimize the possibility of any noise in the photos. The HDR post processing introduces noise, so using the lowest ISO possible helps reduce this in the final photograph. I then choose an Aperture value that gives me the depth of field that I am after. I almost always use my Canon 7D and a Sigma 10-20MM Wide Angle Lens. The wide angle lens is selected not so much because it is wide, but because I can get CLOSE to my subject. There are often times when the foreground object in my landscape photography is less then 2 feet from the front of my lens! At f/11 my Depth of Filed goes from 1.3 feet to infinity, which is usually more then enough.
I then set my shutter speed to a value where the meter indicates that I have a proper exposure. I take a shot, and then look at the Histogram, and adjust the exposure by increasing or decreasing the shutter speed. It is very important that you adjust the shutter speed and NOT the Aperture! If you adjust the Aperture then you are going to be changing the Depth of Field, and this makes it very difficult, if not impossible to combine these photographs later. After each change I take another shot, adjusting the shutter speed until the Histogram indicates that the exposure is correct. Even though I am going to shoot many brackets, I still want my base photograph to be properly exposed so that I can use it as is, without HDR processing. Once I have established this base, it is time to begin creating the brackets.
I very rarely use the Auto Bracketing feature of my camera, as it only allows me to take 3 bracketed photographs. I simply prefer to do it manually. So, I click my exposure control wheel 3 clicks to decrease my exposure by one full stop. I check my LCD and my histogram and I’ll repeat this process until I am satisfied. When do I stop? When I can clearly see that the brightest object in the photo has the amount of detail that I want to record. When shooting indoors, I usually look at a light in the frame. In many of my brackets, the darkest photo is actually pure black, with just a dim glow where a light bulb is. If I am outside, I am looking at the clouds, zooming in on the LCD to see that I have texture in the whitest of the whites. Once I am happy with the underexposed photos, I return to my base exposure and increase by one full stop. I do the same thing, increasing the exposure by one full stop at a time, again looking at the Histogram and the LCD to decide when to stop. I know when to stop when I can see details in the shadow areas of the landscape.
There is one occasion where i will break my routine. On occasion when I am out shooting, the exposure time is less then ideal for capturing moving objects. If there is motion in the scene that I would like to freeze I will create one “special” photograph. The only thing that I am going to change when creating this special photograph is my ISO, and I’ll increase it as high as I have to to try to capture the motion. Remember, that you cannot adjust your Aperture setting, as this is going to change your DOF. This single, special photo will be used later in our post processing.
Each landscape is different, and depending on the range of tones in the scene, you can end up with a wide variety of brackets. Sometimes 3 shots is all I need, and sometimes it takes 10 shots. I often do not end up with symmetrical brackets either, and often end up with more shots that are underexposed then shots that are overexposed.
The photograph of the torpedo room in this post is one that I made following the shooting process that I have outlined. In my vision of this scene the detail of the red light bulbs was critical, and I knew that normal bracketing would not capture them as I desired. My approach to bracketing is what allows for so much detail in the brightest and darkest areas in a photograph.
It sounds like a long and tedious process, but it really isn’t. I prefer to think of it as deliberate.
2 Comments
Thanks Mike,
Enjoying your article and learning. The Photo is top notch.
Can’t wait for the next article.
Thanks Steve! I should have the next one finished by Sunday!