Blending the Sky and the Foreground in Seascape Photography at Beavertail State Park
Living in Rhode Island, I am very fortunate to have a large number of subjects for photography at my fingertips. If the photography is not working out at one location, it is pretty quick and easy to move to a new location. On the night that I took the photographs in this post I was out to do a bit of car and portrait photography at a local car show, but ended up doing some seascape photography at Beavertail State Park instead. There simply were not enough interesting cars at the car show that evening, and not one of the three models showed! While it might be easy to change locations, one thing that is not easy to change is the equipment that you have on hand, but with a little thinking you can still come home with the shots that you want!
When I head out for a bit of photography, I do not bring every piece of equipment I own. I will pack the gear that I think I am going to need into a couple of small, lightweight bags, and the afternoon in question was no different A wide angle lens for the cars, a portrait lens for people, a 5-in-1 reflector to help soften shadows on people, and my tripod. I brought one filter, a circular polarizer to reduce glare from the glass in the cars. What I did NOT think to bring was my graduated neutral density filters, which I often use to help control the brightness in the sky at sunset. Why would I? I had no intention of doing any seascape photography!
Sunset at Beavertail State Park
When I found my location at Beavertail State Park I loved two things about the seascape in front of me – the colors in the sky and how they transitioned from blue to reds, and the rocks along the shore and how they reflected the warm tones of the sunset and the detail and texture in the rocks themselves. The only problem with the scene is that the extreme range of light, from dark to light, is far too much for my camera to record.
Normally, I would place a graduated neutral density filter over the camera lens, placing the dark portion of the filter over the sky, and the clear part of the filter over the water and the rocks. This filter does a great job of darkening the sky so that I can retain the cloud details and the saturated colors. The only time that it does not do a great job is when I leave it at home on the bookshelf. This doesn’t mean that I cannot make the photograph that I want, it just means that I am going to have to go about things a little bit differently.
When I shoot I almost always shoot in RAW mode. This means that my camera does NOT produce a standard JPG photograph,, but instead simple creates a file of all the information that the camera sees. Today’s digital cameras record the light on a semiconductor sensor, instead of on a piece of film. The camera then takes that information and “develops” a JPG photograph that you can use on your computer. To develop this photograph, the cameras computer makes decisions about things such as deciding what the white balance is, how much saturation to add to the colors, how much sharpening to apply to the photograph. Remember the old Fotomat’s that we used to drop film off to be developed? Well today’s cameras are a photo lab in a little black box. I would much rather develop my own photographs using applications such as Adobe Lightroom, and Adobe Photoshop, where I can make the decisions as to how the final photograph is created.

Foreground Exposure
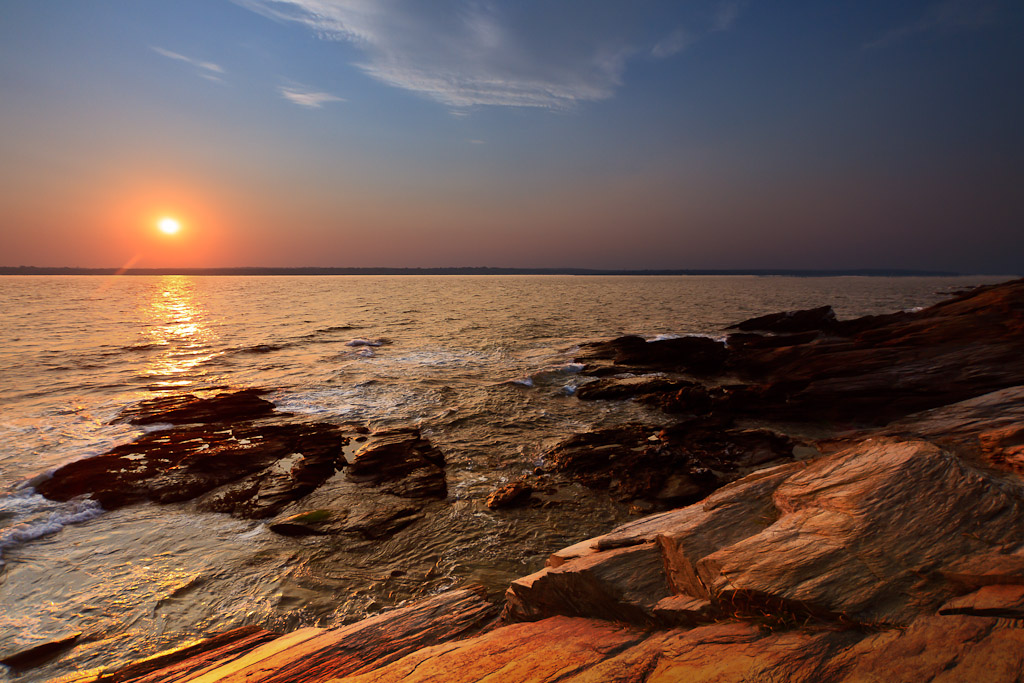
I started off taking a photograph that properly exposed the rocks, and the water close to me. To get the feeling of texture in the rocks, I need to capture the lights and darks in the rocks, however when I do this I lose all of the saturation in the colors of the sky. I could just darken the sky during my post processing, but when you blow out the highlights like this, you lose the details. You might be able to darken those bright spots, but you will never be able to recreate that detail. The only way to get both, is to take both photographs! This photograph gets the foreground, and I will take a second photo for the sky! The key to using this technique is to use a tripod and ONLY change the exposure for the second photograph. This ensures that the two photograph line up when you combine them later.
Sky Exposure
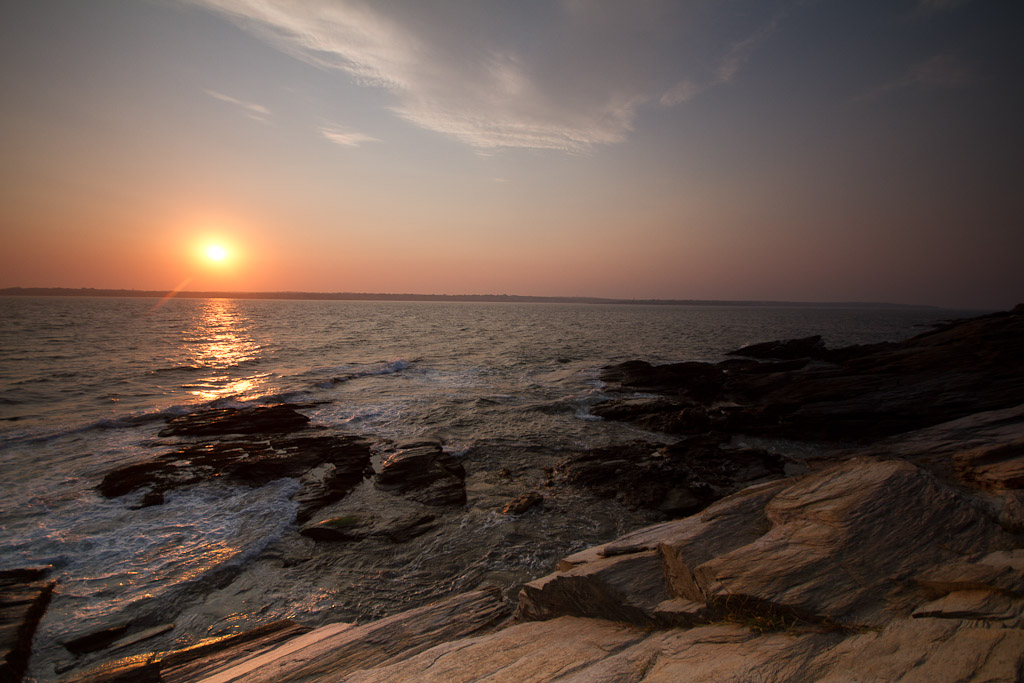
In this second photograph, I exposed the scene for the sky. This preserves the beautiful, rich tones of reds and blues in the sky, and saves the bright white details in the puffy clouds. I do not mind that the sun itself still appears as a bright, fuzzy orange ball in the sky – that is what it is. Our foreground of rocks and water is looking pretty dark though. Again, I could brighten the foreground up using software on the computer, but as with everything else there is a trade-off When you brighten the shadows you introduce digital noise. This noise appears in the photo as a grain, and it can be pretty unattractive. But I already have an photograph where I like the foreground and now I have an photograph where I like the sky. While these photographs are not that significantly different from each other, it is enough to have a dramatic impact on the overall quality of the final photograph. This gives me the pieces that I need to create a photograph that truly represents the scene that I saw when sitting on the rocks that evening, I just need to do a little work on the computer to put it all together.
Once I got my photographs home it was just a matter of putting the pieces together. I took each photograph (the foreground and the sky) into Photoshop Lightroom for basic development. Here I applied a camera profile to the photographs, applied some lens corrections to fix distortion from the wide angle lens. Each photograph also received some development to bring out the colors, reduce any noise. At this point the photographs are taken into Adobe Photoshop as layers. Think of this as stacking the photographs on top of each other on a table. The photograph with the nice sky on the top of the stack prevents you from seeing the photograph with the nice foreground that is underneath it. Sounds pointless right? It is, until we make one powerful change – we add a mask. Think of this as being able to cut the dark foreground out of the top photograph and throwing it away. This allows the nice foreground photograph from the bottom of the stack to be visible at the same time that we have the nice sky visible. We have just combined our two photographs into one!
After combining the photographs into one, I have a base for the photograph that I want to create. There are still a few additional edits that I will make before being done. I dodged and burned the rocks a bit to darken them slightly, and to help enhance the feeling of texture. The whitecaps in the water were dodged to brighten them up slightly to help them stand out against the darker water and rocks. I cropped the photograph slightly, and straightened the horizon before applying some final noise reduction and sharpening before converting the photograph to the JPG that you see below.
While it may seem like a lot of work on the computer, this photograph actually took less then 30 minutes to create from start to finish. I hope that you enjoy my seascape photography from Beavertail State Park, and as always comments are always welcome.